Before reading this document, make sure you have completed the Integration Guide and are familiar with the APIs for creating a checkout.
The PayKKa iOS SDK makes it easy to natively embed multiple payment methods in your iOS app. Simply pass a sessionId to the SDK to open the checkout in your app, accept payments from users, and customize and handle the relevant payment callbacks. You can find the latest SDK download in iOS SDK Release History and Changelog.
After downloading the SDK, you will get a .zip file with a directory structure similar to the following:
.
├── Libs
│   ├── AlipayPlusClient.xcframework
│   ├── CardinalMobile.xcframework
│   ├── PayKKaCheckoutPayments.xcframework
│   └── ...
└── PayKKaCheckoutApp-iOS
    ├── OcCheckoutDemo
    ├── PayKKaCheckoutApp-iOS.xcworkspace
    └── SwiftCheckoutDemo
PayKKaCheckoutApp-iOS contains example apps written in Objective-C and Swift. Developers can use the example code to learn how to use the PayKKa SDK APIs.
PayKKaCheckoutPayments.xcframework in the root-level Libs folder is the core PayKKa SDK and is required for all integration methods. To add it, select Project Navigator <Your Project Name> → TARGETS <Your TARGET> → Build Phases → Link Binary With Libraries → + → Add Files… in Xcode, and then select Libs/PayKKaCheckoutPayments.xcframework.
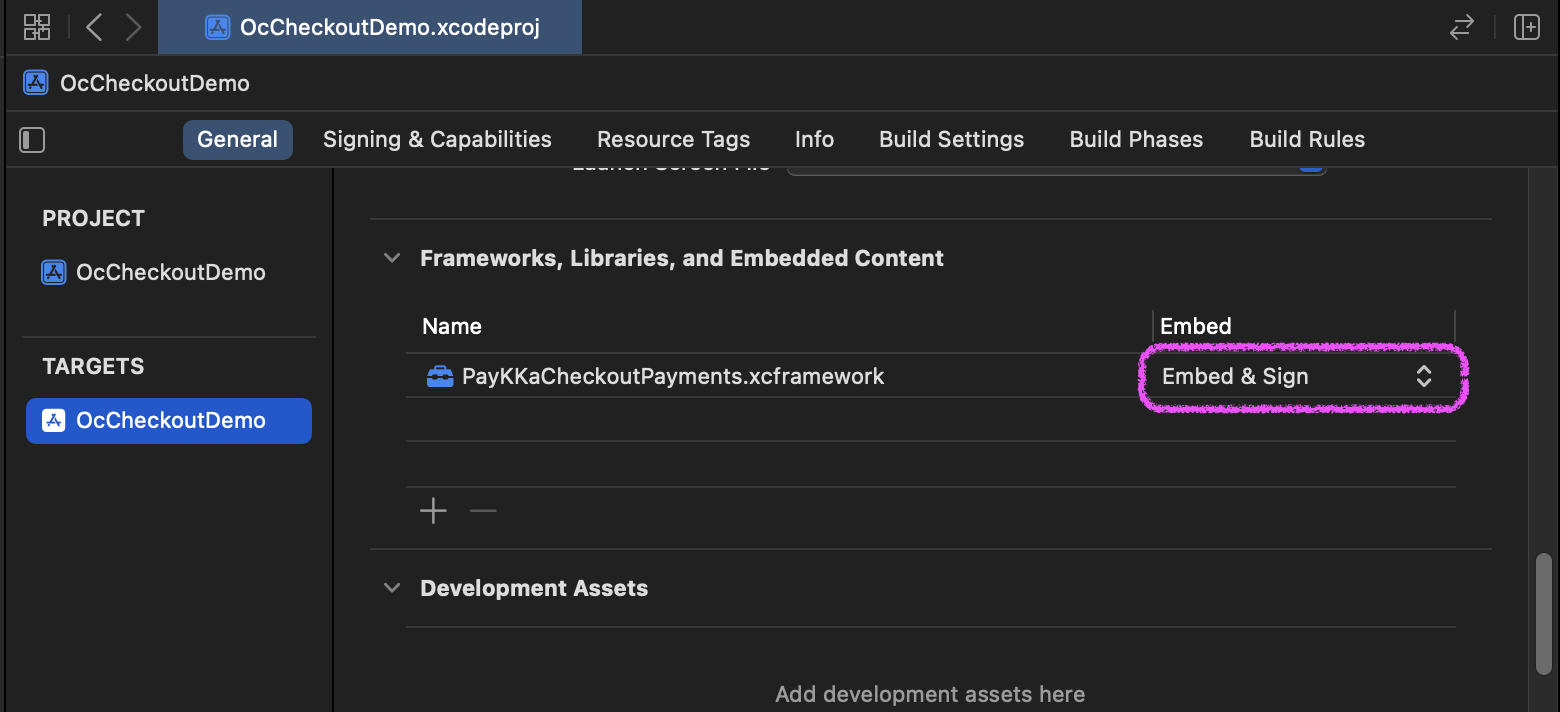
Under TARGETS <Your TARGET> → General → Frameworks, Libraries, and Embedded Content, make sure all added .xcframework files are set to Embed & Sign, as shown below:
The Libs folder also contains the dependencies required by each payment method. In addition to the core SDK, add the corresponding .xcframework files for your chosen integration method:
| Integration Method | Payment Method | Recommended XCFrameworks |
|---|---|---|
| Drop-In | All payment methods | All .xcframework files in the Libs folder |
| Component | Card payment | CardinalMobile.xcframework, StripeCore.xcframework, Stripe3DS2.xcframework, StripePayments.xcframework |
| Component | Apple Pay | CardinalMobile.xcframework, StripeCore.xcframework, Stripe3DS2.xcframework, StripePayments.xcframework |
| Component | Alipay+ | AlipayPlusClient.xcframework |
| Component | WeChat Pay | WechatOpenSDK.xcframework |
The SDK supports iOS 14.0 and later.
During initialization, the SDK verifies that the host app's Bundle Identifier, the signing Team ID, and the information registered in the PayKKa database match. This confirms that SDK calls come from an app packaged through the merchant's official channel. Therefore, you need to provide the following information to your PayKKa integration contact:
- The app's
Bundle Identifier - The
Team IDof the Apple Developer account used to sign the app
You can find the Bundle Identifier in Xcode under TARGETS <Your TARGET> → Signing & Capabilities → Signing → Bundle Identifier. You can find the Team ID in your Apple Developer Account.
Your PayKKa integration contact will generate a PayKKaAppCode based on the information above. Then add the following configuration to your app project's Info.plist:
<key>paykka_appcode</key>
<string>{YourPayKKaAppCode}</string>
<key>paykka_mch_teamid</key>
<string>{YourAppleTeamID}</string>paykka_appcode: Enter thePayKKaAppCodegenerated for you by PayKKa.paykka_mch_teamid: Enter theTeam IDof the Apple Developer account used to sign the app.

After adding the SDK and configuring AppCode, you can use the PayKKa Checkout SDK in your app. The SDK provides two main integration methods: Drop-In, an embedded checkout that provides a complete payment form with multiple payment methods, and Component, a component-based checkout that contains only one payment method.
The key Swift and Objective-C code is provided below. For the complete code, refer to the PayKKaCheckoutApp-iOS Xcode project in the SDK download package.
First define the SDK environment, merchant information, and the configuration required by each payment method. You can omit configuration for payment methods you do not use.
import Foundation
import PayKKaCheckoutPayments

struct AppConf {
    static let EXAMPLE_CHECKOUT_SESSION_ID: String = "{YOUR_EXAMPLE_CHECKOUT_SESSION_ID}"
    static let ENVIRONMENT: PayKKaEnv = .SANDBOX
    static let CONFIGURATION: PayKKaConf = {
        PayKKaConf(dict: [
            KEY_GATEWAY_MERCHANT_ID: "{YOUR_GATEWAY_MERCHANT_ID}",
            KEY_CLIENT_KEY: "{YOUR_CLIENT_KEY}",
            KEY_APPLE_PAY_MERCHANT_ID: "{YOUR_APPLE_PAY_MERCHANT_ID}",
            KEY_ALIPAY_PLUS_ACQUIRER_ID: "{YOUR_ALIPAY_PARTICIPANT_ID}",
            KEY_WECHAT_PAY_APP_ID: "{YOUR_WECHATPAY_APP_ID}",
            KEY_WECHAT_PAY_APP_UNIVERSAL_LINK: "{YOUR_APP_UNIVERSAL_LINK}",
        ])
    }()
}
Configuration details:
KEY_GATEWAY_MERCHANT_ID: Required. Your PayKKa merchant ID.KEY_CLIENT_KEY: Required. Your client key.KEY_APPLE_PAY_MERCHANT_ID: When integrating Apple Pay, enter your Apple Pay Merchant ID.KEY_ALIPAY_PLUS_ACQUIRER_ID: When integrating Alipay+, enter yourParticipant IDfrom the Alipay+ Developer Center.KEY_WECHAT_PAY_APP_ID: When integrating WeChat Pay, enter your WeChat Open Platform App ID.KEY_WECHAT_PAY_APP_UNIVERSAL_LINK: When integrating WeChat Pay, enter your Universal Link.
The EXAMPLE_CHECKOUT_SESSION_ID in the examples is for demonstration only. In an actual integration, the merchant backend should call the PayKKa API to create a Checkout Session for the corresponding mode and then pass the returned Session ID to the app. Drop-In and Component use different Session types; do not mix them.
All payment methods return payment results, errors, and user cancellation events through PKPaymentResultCallback. The common callback code below is reused by the payment methods that follow.
import Foundation
import PayKKaCheckoutPayments

class CheckoutCoordinator: NSObject, ObservableObject, PKPaymentResultCallback {
    @Published var isLoading = false
    @Published var isPayEnabled = true
    @Published var presentedError: CheckoutPresentedError?

    let sessionID: String
    private var onFinished: ((PKPaymentResult) -> Void)?
    private var hasFinished = false

    init(sessionID: String, onFinished: @escaping (PKPaymentResult) -> Void) {
        self.sessionID = sessionID
        self.onFinished = onFinished
        super.init()
    }

    func pay() {}

    func onResult(_ paymentResult: PKPaymentResult) {
        runOnMain { [weak self] in
            guard let self, !self.hasFinished else { return }
            guard paymentResult.status == .success || paymentResult.status == .expired else {
                self.isLoading = false
                return
            }
            self.hasFinished = true
            self.isLoading = false
            self.onFinished?(paymentResult)
        }
    }

    func onError(_ throwable: Any) {
        runOnMain { [weak self] in
            self?.isLoading = false
            self?.presentedError = CheckoutPresentedError(message: Self.errorMessage(from: throwable))
        }
    }

    func onUserCanceled(_ paymentSource: PKPaymentBase?, extraData: [AnyHashable: Any]?) {
        runOnMain { [weak self] in
            self?.isLoading = false
        }
    }

    func tearDown() {
        onFinished = nil
    }

    func runOnMain(_ action: @escaping () -> Void) {
        if Thread.isMainThread {
            action()
        } else {
            DispatchQueue.main.async(execute: action)
        }
    }

    private static func errorMessage(from throwable: Any) -> String {
        if let error = throwable as? NSError {
            return error.localizedDescription
        }
        return String(describing: throwable)
    }
}
The example treats only successful payments and expired Checkout Sessions as terminal page states. When an error occurs or the user cancels the payment, the example stops the loading state and remains on the current page. You can display a message or allow the user to retry the payment according to your business needs.
Drop-In mode provides a complete checkout with multiple payment methods and is simpler to integrate. After the merchant backend calls the PayKKa API to initialize a Drop-In Checkout Session ID, the app passes the Session ID to PKPaymentBottomSheet to display the payment form and guide the user through payment.
import SwiftUI
import PayKKaCheckoutPayments

final class DropInCheckoutCoordinator: CheckoutCoordinator {
    private var paymentBottomSheet: PKPaymentBottomSheet?

    override func pay() {
        guard !isLoading, paymentBottomSheet == nil else { return }
        isLoading = true

        let sheet = PKPaymentBottomSheet(checkoutSessionId: sessionID) { [weak self] _ in
            self?.runOnMain {
                self?.isLoading = false
                self?.paymentBottomSheet = nil
            }
        }
        sheet.onPayCallback = self
        sheet.showMerchantName()
        paymentBottomSheet = sheet
        sheet.show(fromPresenter: nil, completion: nil)
    }

    override func tearDown() {
        paymentBottomSheet?.hide()
        paymentBottomSheet = nil
        super.tearDown()
    }
}

struct DropInCheckoutConfirmOrder: View {
    @StateObject private var coordinator: DropInCheckoutCoordinator

    init(sessionID: String, onFinished: @escaping (PKPaymentResult) -> Void) {
        _coordinator = StateObject(wrappedValue: DropInCheckoutCoordinator(sessionID: sessionID, onFinished: onFinished))
    }

    var body: some View {
        BaseCheckoutConfirmOrder(error: $coordinator.presentedError) {
            EmptyView()
        } paymentArea: {
            CheckoutPayButton(
                title: "Pay Now ¥1118.83",
                isLoading: coordinator.isLoading,
                isEnabled: coordinator.isPayEnabled,
                action: coordinator.pay
            )
        }
        .onDisappear(perform: coordinator.tearDown)
    }
}
Calling showMerchantName() displays the merchant name in the form. Omit this call if you do not need to display it. When leaving the page or no longer using the form, call hide() and release the PKPaymentBottomSheet instance.
Component mode provides a component for a single payment method. You can embed the required component at a specific location in your app for greater customization. After the merchant backend calls the PayKKa API to initialize a Component Checkout Session ID, the app passes the Session ID to the corresponding payment component to accept payments.
The card payment component uses PKCardPaymentForm to display the card information entry form and controls the payment button state through form validation callbacks.
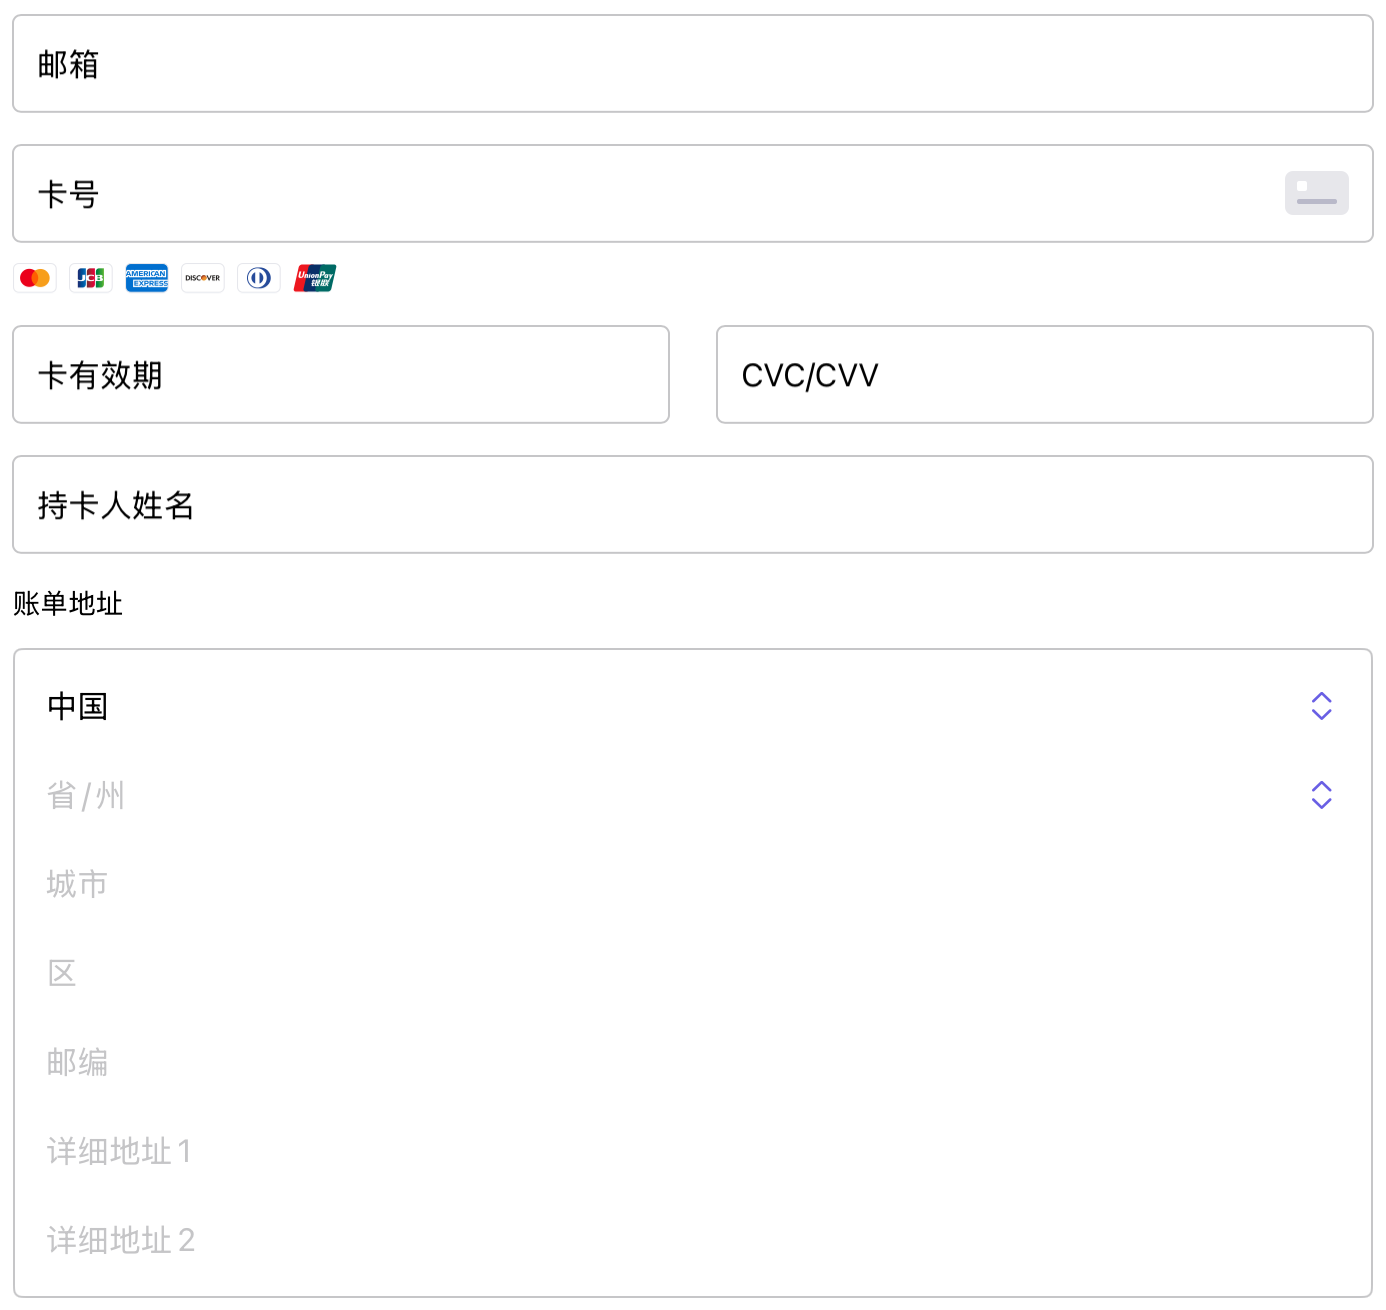
⒈ Embed the UIKit card payment form in SwiftUI.
import SwiftUI
import PayKKaCheckoutPayments

struct CardPaymentFormView: UIViewRepresentable {
    let form: PKCardPaymentForm

    func makeUIView(context: Context) -> PKCardPaymentForm { form }
    func updateUIView(_ uiView: PKCardPaymentForm, context: Context) {}
}
⒉ Initialize the form and PKBankCardPayment, monitor the form validation state, and initiate the payment.
import SwiftUI
import PayKKaCheckoutPayments

final class BankCardPayCheckoutCoordinator: CheckoutCoordinator {
    let form = PKCardPaymentForm()
    private var payment: PKBankCardPayment?
    private var isFormInitialized = false

    override init(sessionID: String, onFinished: @escaping (PKPaymentResult) -> Void) {
        super.init(sessionID: sessionID, onFinished: onFinished)
        isLoading = true
        isPayEnabled = false
        form.isEnabled = false

        payment = PKBankCardPayment(
            pkCardPaymentForm: form,
            checkoutSessionId: sessionID
        ) { [weak self] error, _ in
            guard let self else { return }
            if let error {
                self.form.setError(error)
                self.isLoading = false
                self.isPayEnabled = false
                self.presentedError = CheckoutPresentedError(message: error.localizedDescription)
                return
            }

            self.isFormInitialized = true
            self.form.isEnabled = true
            self.isLoading = false
        }
        payment?.paymentResultCallback = self

        form.setEditingChangedCallback({ [weak self] in
            guard let self, self.isFormInitialized else { return }
            self.isPayEnabled = true
        }, onFieldInputInvalidCallback: { [weak self] _ in
            self?.isPayEnabled = false
        })
    }

    override func pay() {
        guard isFormInitialized, isPayEnabled, !isLoading, let payment else { return }
        isLoading = true
        payment.setError(nil)
        payment.perform(NSSelectorFromString("requestPaymentWithCheckoutSessionId:"), with: sessionID)
    }

    override func tearDown() {
        payment?.paymentResultCallback = nil
        payment = nil
        super.tearDown()
    }
}

struct BankCardPayConfirmOrder: View {
    @StateObject private var coordinator: BankCardPayCheckoutCoordinator

    init(sessionID: String, onFinished: @escaping (PKPaymentResult) -> Void) {
        _coordinator = StateObject(wrappedValue: BankCardPayCheckoutCoordinator(sessionID: sessionID, onFinished: onFinished))
    }

    var body: some View {
        BaseCheckoutConfirmOrder(error: $coordinator.presentedError) {
            CardPaymentFormView(form: coordinator.form)
                .disabled(!coordinator.form.isEnabled)
        } paymentArea: {
            CheckoutPayButton(
                title: "Card Payment ¥1118.83",
                isLoading: coordinator.isLoading,
                isEnabled: coordinator.isPayEnabled,
                action: coordinator.pay
            )
        }
        .onDisappear(perform: coordinator.tearDown)
    }
}
Before integrating Apple Pay, add the Apple Pay Capability under TARGETS <Your TARGET> → Signing & Capabilities in Xcode and select your Merchant ID. This Merchant ID must match the KEY_APPLE_PAY_MERCHANT_ID configuration.
⒈ Embed the Apple Pay form in SwiftUI.
struct ApplePaymentFormView: UIViewRepresentable {
    let form: PKApplePaymentForm

    func makeUIView(context: Context) -> PKApplePaymentForm {
        form.accessibilityIdentifier = "checkout-pay-button"
        return form
    }

    func updateUIView(_ uiView: PKApplePaymentForm, context: Context) {}
}
⒉ Initialize PKApplePayment, bind the payment button, and initiate the payment.
import PassKit
import SwiftUI
import PayKKaCheckoutPayments

final class ApplePayCheckoutCoordinator: CheckoutCoordinator, PKPaymentInterceptor {
    let form = PKApplePaymentForm()
    private let payment: PKApplePayment

    override init(sessionID: String, onFinished: @escaping (PKPaymentResult) -> Void) {
        payment = PKApplePayment(checkoutSessionId: sessionID)
        super.init(sessionID: sessionID, onFinished: onFinished)
        form.isHidden = false
        form.pkApplePaymentButton.addTarget(self, action: #selector(payButtonTapped), for: .touchUpInside)
        payment.form = form
        payment.paymentResultCallback = self
        payment.interceptor = self
    }

    @objc private func payButtonTapped() {
        pay()
    }

    override func pay() {
        guard !isLoading else { return }
        isLoading = true
        form.setLoading(true, animated: true)
        payment.setError(nil)
        payment.request()
    }

    func beforeRequestPayment(_ paymentSource: Any) {
        guard let payment = paymentSource as? PKApplePayment,
              let request = payment.paymentRequest else { return }
        let items = [
            PKPaymentSummaryItem(label: "Goods 1", amount: .zero),
            PKPaymentSummaryItem(label: "Goods 2", amount: .zero)
        ]
        request.paymentSummaryItems = items + request.paymentSummaryItems
    }

    override func onResult(_ paymentResult: PKPaymentResult) {
        stopLoading()
        super.onResult(paymentResult)
    }

    override func onError(_ throwable: Any) {
        stopLoading()
        super.onError(throwable)
    }

    override func onUserCanceled(_ paymentSource: PKPaymentBase?, extraData: [AnyHashable: Any]?) {
        stopLoading()
        super.onUserCanceled(paymentSource, extraData: extraData)
    }

    override func tearDown() {
        payment.paymentResultCallback = nil
        payment.interceptor = nil
        payment.form = nil
        form.pkApplePaymentButton.removeTarget(self, action: #selector(payButtonTapped), for: .touchUpInside)
        super.tearDown()
    }

    private func stopLoading() {
        runOnMain { [weak self] in
            self?.isLoading = false
            self?.form.setLoading(false, animated: true)
        }
    }
}
The example uses PKPaymentInterceptor to add product items before the payment summary generated by the SDK. Goods 1, Goods 2, and the zero amounts in the example are only used to demonstrate the API. In an actual project, you must use product names and amounts that match the order. Do not copy merchant.com.paykka.apptest directly from the demo; configure your own Merchant ID in the Apple Pay Capability.
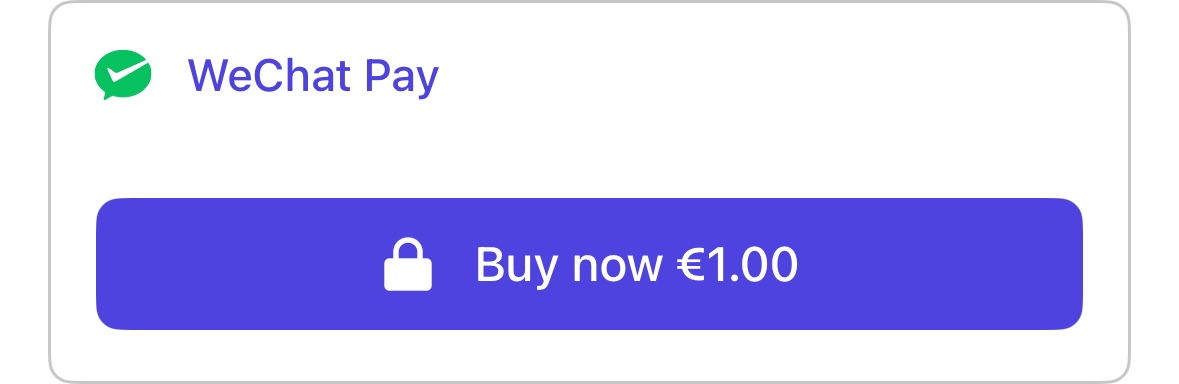
When integrating WeChat Pay, in addition to the payment component code, you must configure the URL Scheme, Universal Link, and payment return handling.
⒈ Embed the WeChat Pay form in SwiftUI and initialize the payment component.
struct WeChatPaymentFormView: UIViewRepresentable {
    let form: PKWeChatPaymentForm

    func makeUIView(context: Context) -> PKWeChatPaymentForm { form }
    func updateUIView(_ uiView: PKWeChatPaymentForm, context: Context) {}
}
⒉ Handle URL Scheme and Universal Link returns in the SwiftUI app lifecycle.
import SwiftUI
import PayKKaCheckoutPayments
import AlipayPlusClient

@main
struct SwiftCheckoutDemoApp: App {
    @StateObject var router = NavigationRouter()

    init() {
        PayKKa.Init(AppConf.CONFIGURATION, AppConf.ENVIRONMENT)
    }

    var body: some Scene {
        WindowGroup {
            Index()
                .environmentObject(router)
                .onOpenURL { url in
                    let client = AlipayPlusClient.shared()
                    if client.canProcessOrder(withPaymentResult: url) {
                        client.processOrder(withPaymentResult: url)
                    }
                    _ = WeChatPayKKaHandler.handleOpen(url)
                }
                .onContinueUserActivity(NSUserActivityTypeBrowsingWeb) { activity in
                    _ = WeChatPayKKaHandler.handleUniversalLink(activity)
                }
        }
    }
}
Register your WeChat App ID in Info.plist and allow queries for the URL Schemes used by the WeChat client:
<key>CFBundleURLTypes</key>
<array>
    <dict>
        <key>CFBundleTypeRole</key>
        <string>Editor</string>
        <key>CFBundleURLName</key>
        <string>wechat</string>
        <key>CFBundleURLSchemes</key>
        <array>
            <string>{YOUR_WECHATPAY_APP_ID}</string>
        </array>
    </dict>
</array>
<key>LSApplicationQueriesSchemes</key>
<array>
    <string>weixin</string>
    <string>weixinULAPI</string>
</array>
Then add the Associated Domains Capability under Signing & Capabilities in Xcode and configure your domain:
<key>com.apple.developer.associated-domains</key>
<array>
    <string>applinks:{YOUR_ASSOCIATED_DOMAIN}</string>
</array>
Make sure the following configurations match:
- The URL Scheme in
Info.plist,KEY_WECHAT_PAY_APP_ID, and the WeChat Open Platform App ID must match. - The domain in Associated Domains, the Universal Link configured in the WeChat Open Platform, and
KEY_WECHAT_PAY_APP_UNIVERSAL_LINKmust match.
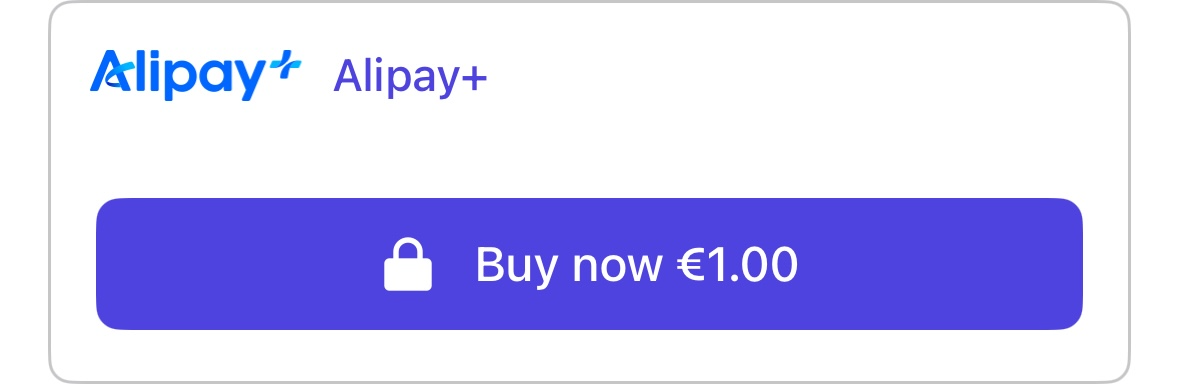
When integrating Alipay+, you must add AlipayPlusClient.xcframework, configure the payment return URL Scheme, and pass the system return URL to AlipayPlusClient for handling.
⒈ Embed the Alipay+ form in SwiftUI and initialize the payment component.
struct AlipayPlusPaymentFormView: UIViewRepresentable {
    let form: PKAlipayPlusPaymentForm

    func makeUIView(context: Context) -> PKAlipayPlusPaymentForm { form }
    func updateUIView(_ uiView: PKAlipayPlusPaymentForm, context: Context) {}
}
⒉ Handle the Alipay+ return in the SwiftUI app lifecycle.
.onOpenURL { url in
    let client = AlipayPlusClient.shared()
    if client.canProcessOrder(withPaymentResult: url) {
        client.processOrder(withPaymentResult: url)
    }
    _ = WeChatPayKKaHandler.handleOpen(url)
}
Register the return URL Scheme for Alipay+ in Info.plist:
<key>CFBundleURLTypes</key>
<array>
    <dict>
        <key>CFBundleTypeRole</key>
        <string>Editor</string>
        <key>CFBundleURLName</key>
        <string>alixpay</string>
        <key>CFBundleURLSchemes</key>
        <array>
            <string>{YOUR_ALIPAY_PLUS_URL_SCHEME}</string>
        </array>
    </dict>
</array>
paykka-sw-checkout-demo and paykka-oc-checkout-demo in the example app are demonstration values only. Replace them with your own URL Scheme.
You can test payments in the PayKKa sandbox environment (SANDBOX) and switch to the corresponding production environment before releasing your app.
// You can specify the payment environment in the Init method
PayKKa.Init(AppConf.CONFIGURATION, AppConf.ENVIRONMENT)

/// SANDBOX (default)
PayKKa.useEnv(.SANDBOX)
/// Switch to the EU production environment
PayKKa.useEnv(.PROD_EU)
/// Switch to the HK production environment
PayKKa.useEnv(.PROD_HK)
Apple Pay sandbox testing requires a physical device compatible with Apple Pay, a sandbox test account, and test cards. Alipay+ and WeChat Pay involve switching to external apps, so use a physical device to verify the URL Scheme and Universal Link return flows.