阅读此文档前,确保您已完成 集成指南,并了解了 创建收银台的相关 API。
PayKKa 提供的 iOS SDK 可以方便您在 iOS App 内以原生方式嵌入多种支付方式。只需向 SDK 传入一个 sessionId,即可在 App 内打开收银台、接收用户付款,并自定义和处理相关的支付回调。SDK 最新的下载地址可以在 iOS SDK 历史版本和更新日志 中找到。
SDK 下载后会得到一个 .zip 文件,大致目录结构如下:
.
├── Libs
│   ├── AlipayPlusClient.xcframework
│   ├── CardinalMobile.xcframework
│   ├── PayKKaCheckoutPayments.xcframework
│   └── ...
└── PayKKaCheckoutApp-iOS
    ├── OcCheckoutDemo
    ├── PayKKaCheckoutApp-iOS.xcworkspace
└── SwiftCheckoutDemo其中,PayKKaCheckoutApp-iOS 包含分别使用 Objective-C 和 Swift 编写的示例 App。开发者可以通过示例代码了解 PayKKa SDK 的 API 使用方式。
根目录下 Libs 文件夹中的 PayKKaCheckoutPayments.xcframework 是 PayKKa 的基础 SDK,所有接入方式均需引入该文件。引入方法如下:在 Xcode 中依次选择 左侧项目导航器 <您的项目名称> → TARGETS <您的 TARGET> → Build Phases → Link Binary With Libraries → + → Add Files…,然后选择 Libs/PayKKaCheckoutPayments.xcframework。
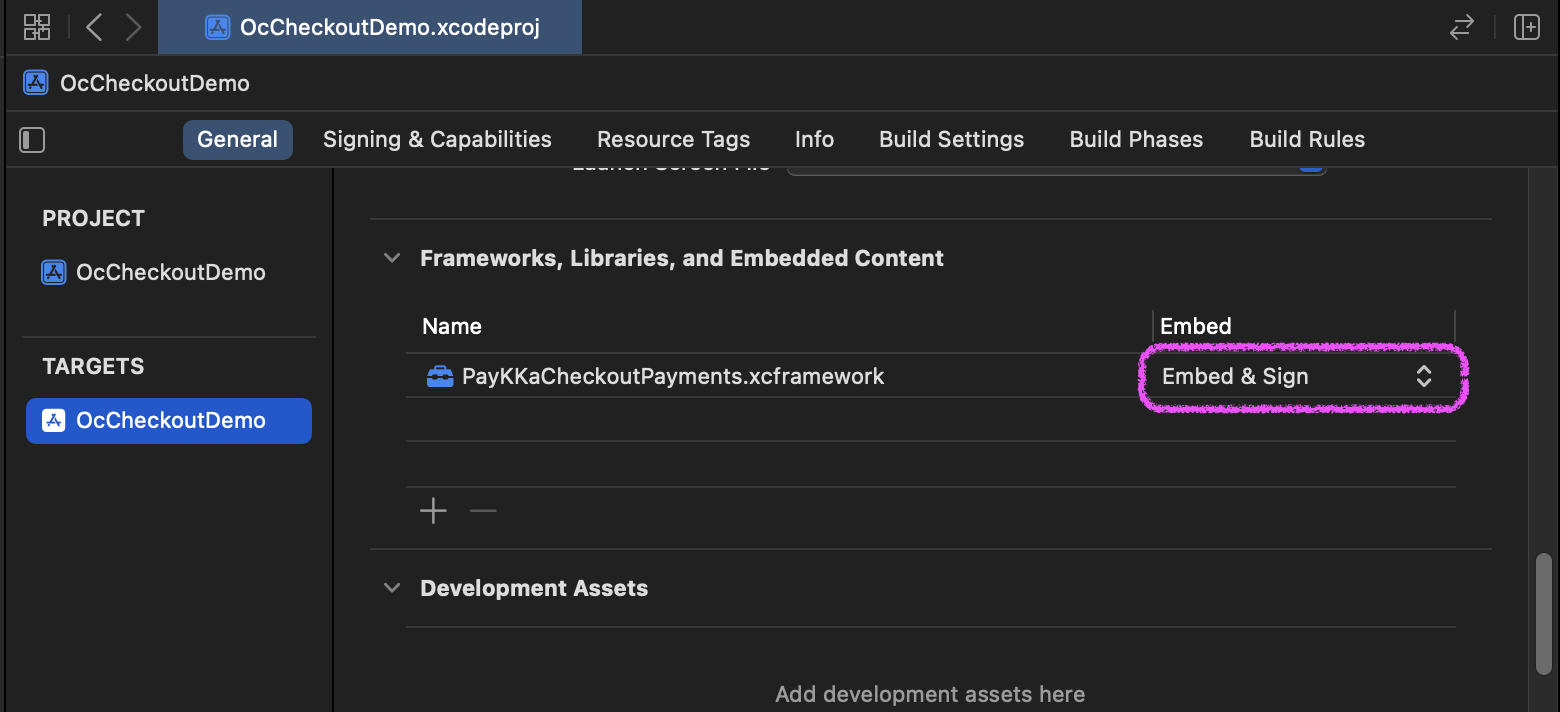
在 TARGETS <您的 TARGET> → General → Frameworks, Libraries, and Embedded Content 中,请确保引入的 .xcframework 均设置为 Embed & Sign,如下图所示:
Libs 文件夹中还包含各支付方式所需的依赖库。除基础 SDK 外,请根据所选择的接入方式引入对应的 .xcframework 文件:
| 接入方式 | 支付方式 | 建议引入的 XCFramework |
|---|---|---|
| Drop-In | 全部支付方式 | Libs 文件夹下的全部 .xcframework 文件 |
| Component | 卡支付 | CardinalMobile.xcframework、StripeCore.xcframework、Stripe3DS2.xcframework、StripePayments.xcframework |
| Component | Apple Pay | CardinalMobile.xcframework、StripeCore.xcframework、Stripe3DS2.xcframework、StripePayments.xcframework |
| Component | Alipay+ | AlipayPlusClient.xcframework |
| Component | WeChat Pay | WechatOpenSDK.xcframework |
SDK 最低支持 iOS 14.0。
SDK 初始化时会校验宿主 App 的 Bundle Identifier(包名)、签名使用的 Team ID 与 PayKKa 数据库中登记的信息是否一致,以确认 SDK 调用来自商户官方渠道打包的 App。因此,您需要向 PayKKa 对接人员提供以下信息:
- App 的
Bundle Identifier - App 签名所用 Apple Developer 账号的
Team ID
Bundle Identifier 可以在 Xcode 的 TARGETS <您的 TARGET> → Signing & Capabilities → Signing → Bundle Identifier 中找到。Team ID 可以在 Apple Developer Account 中找到。
PayKKa 对接人员将根据上述信息为您生成 PayKKaAppCode。之后,在 App 工程的 Info.plist 中新增以下配置:
<key>paykka_appcode</key>
<string>{YourPayKKaAppCode}</string>
<key>paykka_mch_teamid</key>
<string>{YourAppleTeamID}</string>paykka_appcode:填写 PayKKa 为您生成的PayKKaAppCode。paykka_mch_teamid:填写 App 签名所用 Apple Developer 账号的Team ID。

SDK 引入并完成 AppCode 配置后,就可以在 App 内使用 PayKKa 收银台 SDK。SDK 主要提供两种接入方式:Drop-In(嵌入式收银台,提供包含多种支付方式的完整支付表单)和 Component(组件式收银台,仅包含单一支付方式)。
以下分别列出 Swift 和 Objective-C 的关键代码。完整代码可以参考 SDK 下载包中的 PayKKaCheckoutApp-iOS Xcode 工程。
请先定义 SDK 运行环境、商户信息及各支付方式所需的配置。未使用的支付方式配置可以不填写。
import Foundation
import PayKKaCheckoutPayments

struct AppConf {
    static let EXAMPLE_CHECKOUT_SESSION_ID: String = "{YOUR_EXAMPLE_CHECKOUT_SESSION_ID}"
    static let ENVIRONMENT: PayKKaEnv = .SANDBOX
    static let CONFIGURATION: PayKKaConf = {
        PayKKaConf(dict: [
            KEY_GATEWAY_MERCHANT_ID: "{YOUR_GATEWAY_MERCHANT_ID}",
            KEY_CLIENT_KEY: "{YOUR_CLIENT_KEY}",
            KEY_APPLE_PAY_MERCHANT_ID: "{YOUR_APPLE_PAY_MERCHANT_ID}",
            KEY_ALIPAY_PLUS_ACQUIRER_ID: "{YOUR_ALIPAY_PARTICIPANT_ID}",
            KEY_WECHAT_PAY_APP_ID: "{YOUR_WECHATPAY_APP_ID}",
            KEY_WECHAT_PAY_APP_UNIVERSAL_LINK: "{YOUR_APP_UNIVERSAL_LINK}",
        ])
    }()
}
配置项说明:
KEY_GATEWAY_MERCHANT_ID:必填,您的 PayKKa 商户号。KEY_CLIENT_KEY:必填,您的客户端密钥。KEY_APPLE_PAY_MERCHANT_ID:接入 Apple Pay 时填写您的 Apple Pay Merchant ID。KEY_ALIPAY_PLUS_ACQUIRER_ID:接入 Alipay+ 时填写您在 Alipay+ Developer Center 中的Participant ID。KEY_WECHAT_PAY_APP_ID:接入 WeChat Pay 时填写您的微信开放平台 App ID。KEY_WECHAT_PAY_APP_UNIVERSAL_LINK:接入 WeChat Pay 时填写您的 Universal Link。
示例中的 EXAMPLE_CHECKOUT_SESSION_ID 仅用于演示。实际接入时,应由商户后端调用 PayKKa API 创建对应模式的 Checkout Session,再将返回的 Session ID 传给 App。Drop-In 和 Component 使用的 Session 类型不同,请勿混用。
各支付方式均通过 PKPaymentResultCallback 返回支付结果、错误和用户取消事件。下面的公共回调代码会被后续支付方式复用。
import Foundation
import PayKKaCheckoutPayments

class CheckoutCoordinator: NSObject, ObservableObject, PKPaymentResultCallback {
    @Published var isLoading = false
    @Published var isPayEnabled = true
    @Published var presentedError: CheckoutPresentedError?

    let sessionID: String
    private var onFinished: ((PKPaymentResult) -> Void)?
    private var hasFinished = false

    init(sessionID: String, onFinished: @escaping (PKPaymentResult) -> Void) {
        self.sessionID = sessionID
        self.onFinished = onFinished
        super.init()
    }

    func pay() {}

    func onResult(_ paymentResult: PKPaymentResult) {
        runOnMain { [weak self] in
            guard let self, !self.hasFinished else { return }
            guard paymentResult.status == .success || paymentResult.status == .expired else {
                self.isLoading = false
                return
            }
            self.hasFinished = true
            self.isLoading = false
            self.onFinished?(paymentResult)
        }
    }

    func onError(_ throwable: Any) {
        runOnMain { [weak self] in
            self?.isLoading = false
            self?.presentedError = CheckoutPresentedError(message: Self.errorMessage(from: throwable))
        }
    }

    func onUserCanceled(_ paymentSource: PKPaymentBase?, extraData: [AnyHashable: Any]?) {
        runOnMain { [weak self] in
            self?.isLoading = false
        }
    }

    func tearDown() {
        onFinished = nil
    }

    func runOnMain(_ action: @escaping () -> Void) {
        if Thread.isMainThread {
            action()
        } else {
            DispatchQueue.main.async(execute: action)
        }
    }

    private static func errorMessage(from throwable: Any) -> String {
        if let error = throwable as? NSError {
            return error.localizedDescription
        }
        return String(describing: throwable)
    }
}
示例仅将支付成功和 Checkout Session 过期作为页面终态。发生错误或用户取消支付时,示例会停止加载状态并停留在当前页面,您可以根据业务需要展示提示或允许用户重新支付。
Drop-In 模式提供包含多种支付方式的完整收银台,接入方式较简单。商户后端调用 PayKKa API 初始化 Drop-In 收银台 Session ID 后,App 将 Session ID 传给 PKPaymentBottomSheet,即可展示支付表单并引导用户完成付款。
import SwiftUI
import PayKKaCheckoutPayments

final class DropInCheckoutCoordinator: CheckoutCoordinator {
    private var paymentBottomSheet: PKPaymentBottomSheet?

    override func pay() {
        guard !isLoading, paymentBottomSheet == nil else { return }
        isLoading = true

        let sheet = PKPaymentBottomSheet(checkoutSessionId: sessionID) { [weak self] _ in
            self?.runOnMain {
                self?.isLoading = false
                self?.paymentBottomSheet = nil
            }
        }
        sheet.onPayCallback = self
        sheet.showMerchantName()
        paymentBottomSheet = sheet
        sheet.show(fromPresenter: nil, completion: nil)
    }

    override func tearDown() {
        paymentBottomSheet?.hide()
        paymentBottomSheet = nil
        super.tearDown()
    }
}

struct DropInCheckoutConfirmOrder: View {
    @StateObject private var coordinator: DropInCheckoutCoordinator

    init(sessionID: String, onFinished: @escaping (PKPaymentResult) -> Void) {
        _coordinator = StateObject(wrappedValue: DropInCheckoutCoordinator(sessionID: sessionID, onFinished: onFinished))
    }

    var body: some View {
        BaseCheckoutConfirmOrder(error: $coordinator.presentedError) {
            EmptyView()
        } paymentArea: {
            CheckoutPayButton(
                title: "立即支付 ¥1118.83",
                isLoading: coordinator.isLoading,
                isEnabled: coordinator.isPayEnabled,
                action: coordinator.pay
            )
        }
        .onDisappear(perform: coordinator.tearDown)
    }
}
调用 showMerchantName() 可以在表单中展示商户名称。如果不需要展示,可省略该调用。页面退出或不再使用表单时,应调用 hide() 并释放 PKPaymentBottomSheet 实例。
Component 模式提供单一支付方式组件。您可以将所需组件嵌入 App 的指定位置,获得更高的定制能力。商户后端调用 PayKKa API 初始化 Component 收银台 Session ID 后,App 将 Session ID 传给对应的支付组件即可完成收款。
卡支付组件通过 PKCardPaymentForm 展示银行卡信息输入表单,并通过表单校验回调控制支付按钮状态。
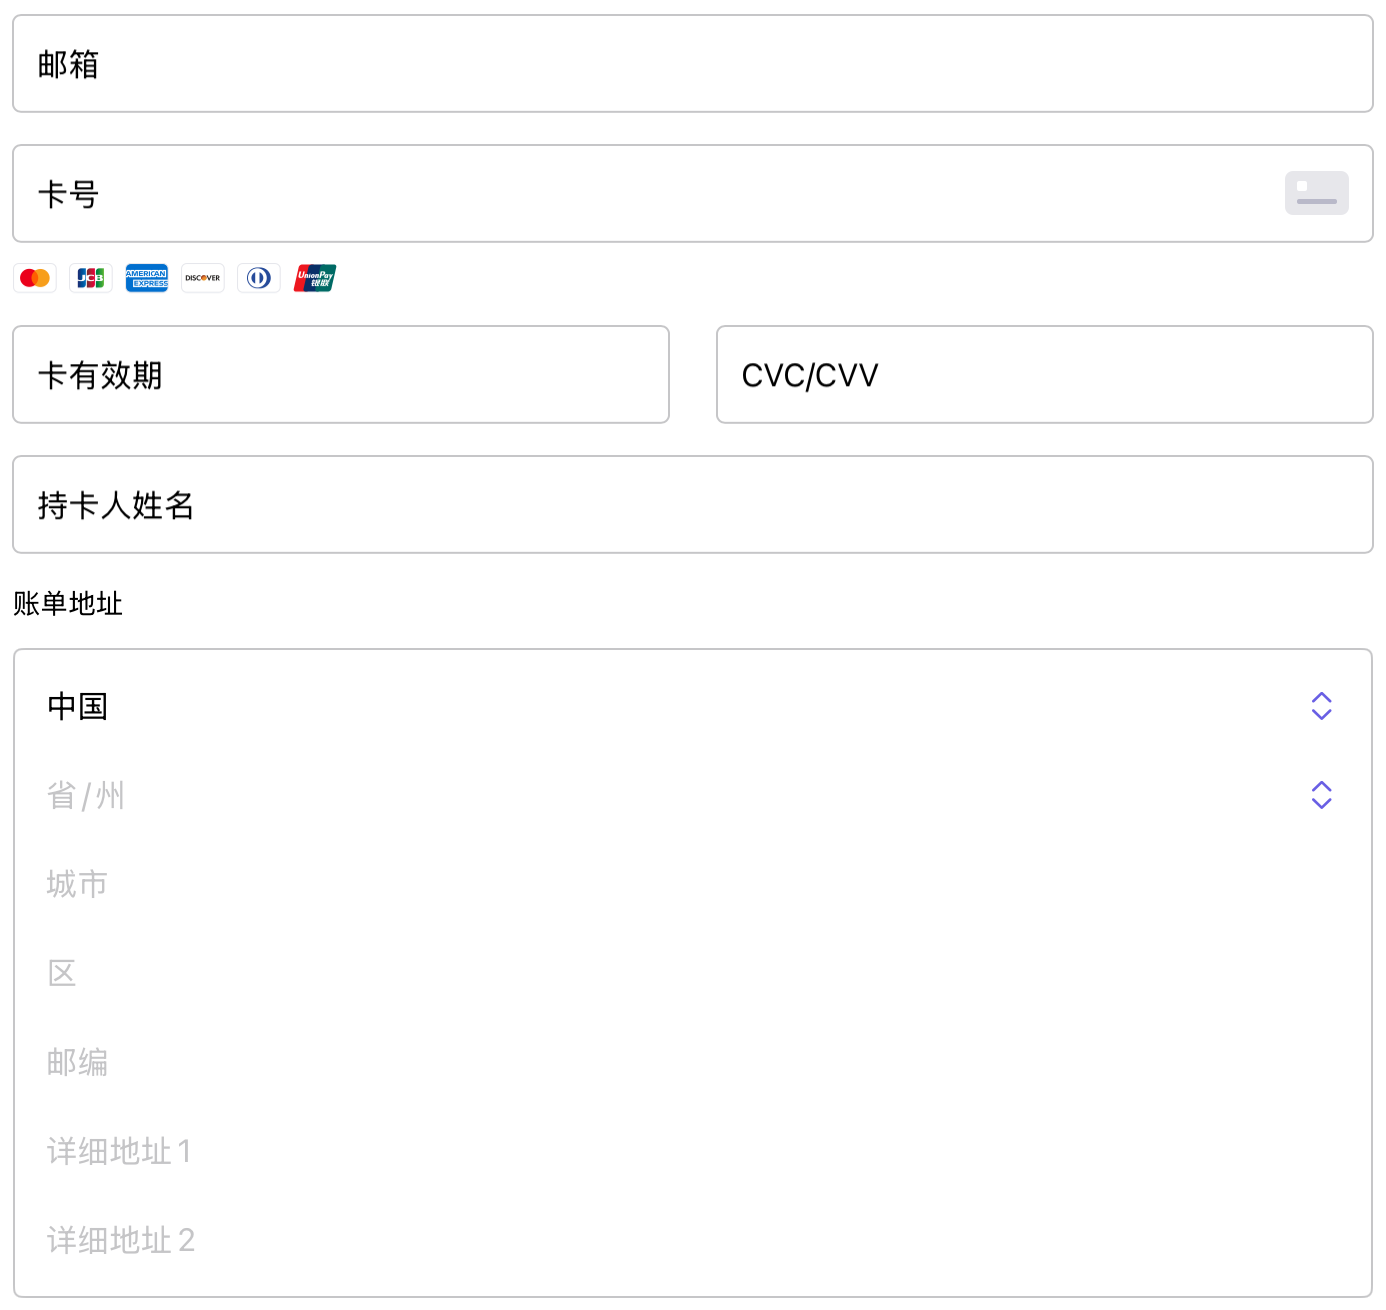
⒈ 将 UIKit 卡支付表单嵌入 SwiftUI。
import SwiftUI
import PayKKaCheckoutPayments

struct CardPaymentFormView: UIViewRepresentable {
    let form: PKCardPaymentForm

    func makeUIView(context: Context) -> PKCardPaymentForm { form }
    func updateUIView(_ uiView: PKCardPaymentForm, context: Context) {}
}
⒉ 初始化表单和 PKBankCardPayment,监听表单校验状态并发起支付。
import SwiftUI
import PayKKaCheckoutPayments

final class BankCardPayCheckoutCoordinator: CheckoutCoordinator {
    let form = PKCardPaymentForm()
    private var payment: PKBankCardPayment?
    private var isFormInitialized = false

    override init(sessionID: String, onFinished: @escaping (PKPaymentResult) -> Void) {
        super.init(sessionID: sessionID, onFinished: onFinished)
        isLoading = true
        isPayEnabled = false
        form.isEnabled = false

        payment = PKBankCardPayment(
            pkCardPaymentForm: form,
            checkoutSessionId: sessionID
        ) { [weak self] error, _ in
            guard let self else { return }
            if let error {
                self.form.setError(error)
                self.isLoading = false
                self.isPayEnabled = false
                self.presentedError = CheckoutPresentedError(message: error.localizedDescription)
                return
            }

            self.isFormInitialized = true
            self.form.isEnabled = true
            self.isLoading = false
        }
        payment?.paymentResultCallback = self

        form.setEditingChangedCallback({ [weak self] in
            guard let self, self.isFormInitialized else { return }
            self.isPayEnabled = true
        }, onFieldInputInvalidCallback: { [weak self] _ in
            self?.isPayEnabled = false
        })
    }

    override func pay() {
        guard isFormInitialized, isPayEnabled, !isLoading, let payment else { return }
        isLoading = true
        payment.setError(nil)
        payment.perform(NSSelectorFromString("requestPaymentWithCheckoutSessionId:"), with: sessionID)
    }

    override func tearDown() {
        payment?.paymentResultCallback = nil
        payment = nil
        super.tearDown()
    }
}

struct BankCardPayConfirmOrder: View {
    @StateObject private var coordinator: BankCardPayCheckoutCoordinator

    init(sessionID: String, onFinished: @escaping (PKPaymentResult) -> Void) {
        _coordinator = StateObject(wrappedValue: BankCardPayCheckoutCoordinator(sessionID: sessionID, onFinished: onFinished))
    }

    var body: some View {
        BaseCheckoutConfirmOrder(error: $coordinator.presentedError) {
            CardPaymentFormView(form: coordinator.form)
                .disabled(!coordinator.form.isEnabled)
        } paymentArea: {
            CheckoutPayButton(
                title: "卡支付 ¥1118.83",
                isLoading: coordinator.isLoading,
                isEnabled: coordinator.isPayEnabled,
                action: coordinator.pay
            )
        }
        .onDisappear(perform: coordinator.tearDown)
    }
}
接入 Apple Pay 前,请在 Xcode 的 TARGETS <您的 TARGET> → Signing & Capabilities 中添加 Apple Pay Capability,并选择您的 Merchant ID。该 Merchant ID 必须与 KEY_APPLE_PAY_MERCHANT_ID 的配置保持一致。
⒈ 将 Apple Pay 表单嵌入 SwiftUI。
struct ApplePaymentFormView: UIViewRepresentable {
    let form: PKApplePaymentForm

    func makeUIView(context: Context) -> PKApplePaymentForm {
        form.accessibilityIdentifier = "checkout-pay-button"
        return form
    }

    func updateUIView(_ uiView: PKApplePaymentForm, context: Context) {}
}
⒉ 初始化 PKApplePayment、绑定支付按钮并发起支付。
import PassKit
import SwiftUI
import PayKKaCheckoutPayments

final class ApplePayCheckoutCoordinator: CheckoutCoordinator, PKPaymentInterceptor {
    let form = PKApplePaymentForm()
    private let payment: PKApplePayment

    override init(sessionID: String, onFinished: @escaping (PKPaymentResult) -> Void) {
        payment = PKApplePayment(checkoutSessionId: sessionID)
        super.init(sessionID: sessionID, onFinished: onFinished)
        form.isHidden = false
        form.pkApplePaymentButton.addTarget(self, action: #selector(payButtonTapped), for: .touchUpInside)
        payment.form = form
        payment.paymentResultCallback = self
        payment.interceptor = self
    }

    @objc private func payButtonTapped() {
        pay()
    }

    override func pay() {
        guard !isLoading else { return }
        isLoading = true
        form.setLoading(true, animated: true)
        payment.setError(nil)
        payment.request()
    }

    func beforeRequestPayment(_ paymentSource: Any) {
        guard let payment = paymentSource as? PKApplePayment,
              let request = payment.paymentRequest else { return }
        let items = [
            PKPaymentSummaryItem(label: "Goods 1", amount: .zero),
            PKPaymentSummaryItem(label: "Goods 2", amount: .zero)
        ]
        request.paymentSummaryItems = items + request.paymentSummaryItems
    }

    override func onResult(_ paymentResult: PKPaymentResult) {
        stopLoading()
        super.onResult(paymentResult)
    }

    override func onError(_ throwable: Any) {
        stopLoading()
        super.onError(throwable)
    }

    override func onUserCanceled(_ paymentSource: PKPaymentBase?, extraData: [AnyHashable: Any]?) {
        stopLoading()
        super.onUserCanceled(paymentSource, extraData: extraData)
    }

    override func tearDown() {
        payment.paymentResultCallback = nil
        payment.interceptor = nil
        payment.form = nil
        form.pkApplePaymentButton.removeTarget(self, action: #selector(payButtonTapped), for: .touchUpInside)
        super.tearDown()
    }

    private func stopLoading() {
        runOnMain { [weak self] in
            self?.isLoading = false
            self?.form.setLoading(false, animated: true)
        }
    }
}
示例通过 PKPaymentInterceptor 在 SDK 生成的付款摘要前添加商品项。示例中的 Goods 1、Goods 2 和零金额仅用于演示 API,实际项目必须使用与订单一致的商品名称和金额。请勿直接复制 Demo 中的 merchant.com.paykka.apptest,应在 Apple Pay Capability 中配置您自己的 Merchant ID。
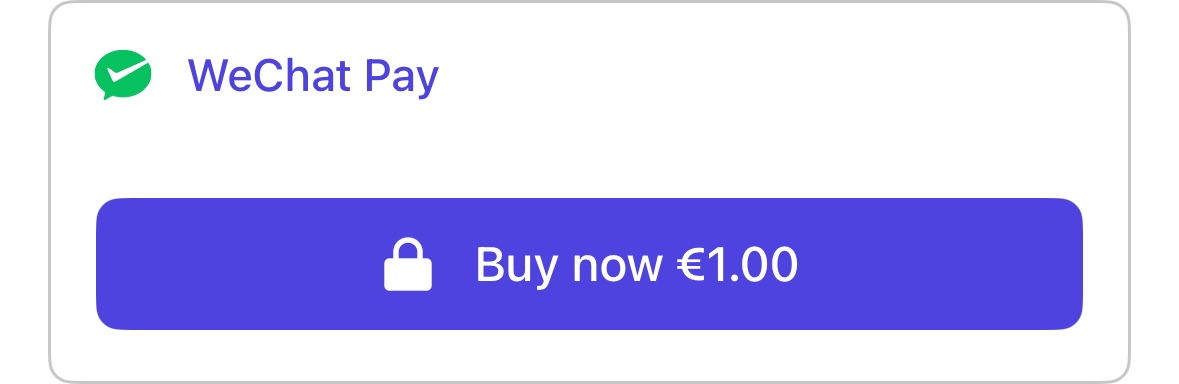
接入 WeChat Pay 时,除支付组件代码外,还需要配置 URL Scheme、Universal Link 和支付回跳处理。
⒈ 将 WeChat Pay 表单嵌入 SwiftUI,并初始化支付组件。
struct WeChatPaymentFormView: UIViewRepresentable {
    let form: PKWeChatPaymentForm

    func makeUIView(context: Context) -> PKWeChatPaymentForm { form }
    func updateUIView(_ uiView: PKWeChatPaymentForm, context: Context) {}
}
⒉ 在 SwiftUI App 生命周期中处理 URL Scheme 和 Universal Link 回跳。
import SwiftUI
import PayKKaCheckoutPayments
import AlipayPlusClient

@main
struct SwiftCheckoutDemoApp: App {
    @StateObject var router = NavigationRouter()

    init() {
        PayKKa.Init(AppConf.CONFIGURATION, AppConf.ENVIRONMENT)
    }

    var body: some Scene {
        WindowGroup {
            Index()
                .environmentObject(router)
                .onOpenURL { url in
                    let client = AlipayPlusClient.shared()
                    if client.canProcessOrder(withPaymentResult: url) {
                        client.processOrder(withPaymentResult: url)
                    }
                    _ = WeChatPayKKaHandler.handleOpen(url)
                }
                .onContinueUserActivity(NSUserActivityTypeBrowsingWeb) { activity in
                    _ = WeChatPayKKaHandler.handleUniversalLink(activity)
                }
        }
    }
}
在 Info.plist 中注册您的微信 App ID,并允许查询微信客户端使用的 URL Scheme:
<key>CFBundleURLTypes</key>
<array>
    <dict>
        <key>CFBundleTypeRole</key>
        <string>Editor</string>
        <key>CFBundleURLName</key>
        <string>wechat</string>
        <key>CFBundleURLSchemes</key>
        <array>
            <string>{YOUR_WECHATPAY_APP_ID}</string>
        </array>
    </dict>
</array>
<key>LSApplicationQueriesSchemes</key>
<array>
    <string>weixin</string>
    <string>weixinULAPI</string>
</array>
然后,在 Xcode 的 Signing & Capabilities 中添加 Associated Domains Capability,并配置您的域名:
<key>com.apple.developer.associated-domains</key>
<array>
    <string>applinks:{YOUR_ASSOCIATED_DOMAIN}</string>
</array>
请确保以下配置相互对应:
Info.plist中的 URL Scheme、KEY_WECHAT_PAY_APP_ID与微信开放平台 App ID 一致。- Associated Domains 中的域名、微信开放平台配置的 Universal Link 与
KEY_WECHAT_PAY_APP_UNIVERSAL_LINK一致。
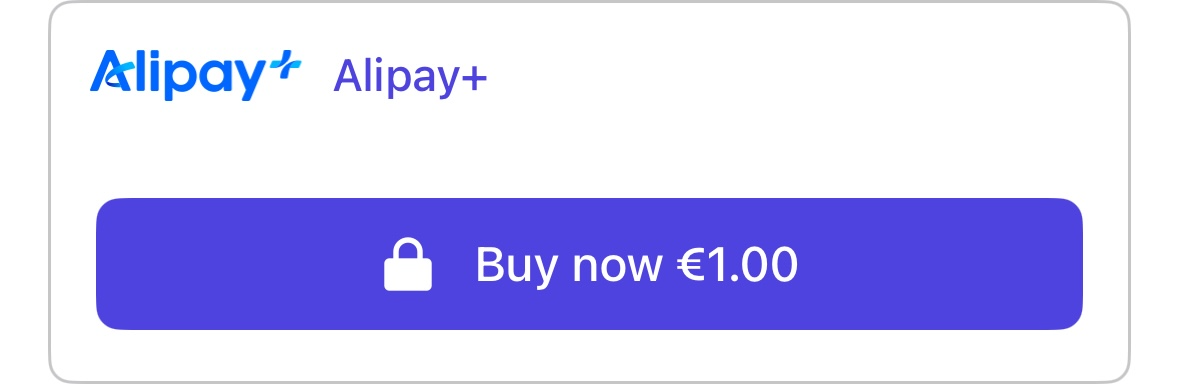
接入 Alipay+ 时,需要引入 AlipayPlusClient.xcframework、配置支付回跳 URL Scheme,并将系统回跳 URL 交给 AlipayPlusClient 处理。
⒈ 将 Alipay+ 表单嵌入 SwiftUI,并初始化支付组件。
struct AlipayPlusPaymentFormView: UIViewRepresentable {
    let form: PKAlipayPlusPaymentForm

    func makeUIView(context: Context) -> PKAlipayPlusPaymentForm { form }
    func updateUIView(_ uiView: PKAlipayPlusPaymentForm, context: Context) {}
}
⒉ 在 SwiftUI App 生命周期中处理 Alipay+ 回跳。
.onOpenURL { url in
    let client = AlipayPlusClient.shared()
    if client.canProcessOrder(withPaymentResult: url) {
        client.processOrder(withPaymentResult: url)
    }
    _ = WeChatPayKKaHandler.handleOpen(url)
}
在 Info.plist 中为 Alipay+ 注册回跳 URL Scheme:
<key>CFBundleURLTypes</key>
<array>
    <dict>
        <key>CFBundleTypeRole</key>
        <string>Editor</string>
        <key>CFBundleURLName</key>
        <string>alixpay</string>
        <key>CFBundleURLSchemes</key>
        <array>
            <string>{YOUR_ALIPAY_PLUS_URL_SCHEME}</string>
        </array>
    </dict>
</array>
示例 App 中的 paykka-sw-checkout-demo 和 paykka-oc-checkout-demo 仅为演示值,请替换为您自己的 URL Scheme。
您可以在 PayKKa 沙盒环境(SANDBOX)中进行支付测试,在发布 App 前再切换到对应的生产环境。
// 可以在 Init 方法中指定支付环境
PayKKa.Init(AppConf.CONFIGURATION, AppConf.ENVIRONMENT)

/// SANDBOX(默认)
PayKKa.useEnv(.SANDBOX)
/// 切换到 EU 生产环境
PayKKa.useEnv(.PROD_EU)
/// 切换到 HK 生产环境
PayKKa.useEnv(.PROD_HK)
Apple Pay 的沙盒测试需要使用兼容 Apple Pay 的真机、沙盒测试账号和测试卡。Alipay+ 与 WeChat Pay 涉及外部 App 跳转,建议使用真机验证 URL Scheme 和 Universal Link 回跳流程。